
Free Laser Material Settings Finder
Pick your laser type and power, your material, and what you're doing, and get a tested starting point that shows you exactly where each number came from. Works for any laser, not just one brand.
Free to use, no membership needed. Pop in your email below and the settings finder unlocks instantly.
Want more? Unlock the Advanced Laser Settings Tool
This free finder gives you tested starting points. Silhouette U members get the full Advanced Laser Settings Tool, free with any membership.
- A full library of exclusive laser tutorial videos
- Add and dial in your own custom materials
- Save and copy your tested settings
- The full settings library across every machine
- Unlimited use, no daily limit
- Same-day 1:1 help from Melissa when you get stuck
- xTool (Creative Space / Studio): use the built-in Material Test / framing test - it runs a grid of power vs speed squares.
- Flux (Beam Studio): File > Examples > Material Engraving or Material Cutting test.
- Any laser: run a small grid stepping power across one axis and speed across the other on a scrap of the real material.
Exclusive Member Benefits
1:1 Assistance
- Personalized 1:1 Chat Help with Melissa
- Questions answered in real time
- Same-day response — no ticket queue
- Support for Laser, Silhouette, Roland, sublimation, DTF & more
Exclusive Assets / Libraries
- 700+ exclusive video tutorials — not on YouTube or anywhere else
- Advanced Laser Settings Finder
- Members-only mini guides & resources
- Monthly Coupon for Fonts & Designs (Pays for your membership!)
Fast Help & Savings
- Access to Member Only Priority Inbox for Fast Email Help
- Private Facebook Group Access
- Live Q and A Video Sessions
- Member Only Deals at Retail Partners
Pick Your Silhouette U Plan and Join
12 Month Enrollment
FULL ACCESS
$149.99/ 12 Months
Automatically Rebilled Every 12 Months
6 Month Enrollment
FULL ACCESS
$79.99/ 6 months
Automatically Rebilled Every 6 Months
Monthly Enrollment
FULL ACCESS
$14.99/Month
Automatically Rebilled Every Month
The Ultimate Silhouette Guide for Cameo 4 eCourse (Cameo 4, Cameo Plus, Cameo Pro)
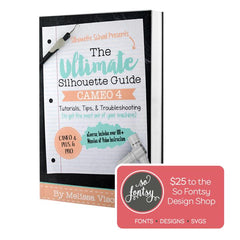
One Time Price!
Eek we’re so excited to have you join us at Silhouette U! We have a special offer for you!The Ultimate Silhouette Guide for CAMEO 4 at 50% off! This is a price we ONLY offer right now - as an add on at Silhouette U sign up. Lots of our members say they use their ebook as a quick reference guide that they can tab and make notes in, in combination with the Silhouette U videos! Having both is hands down the best way to quickly master your Silhouette machine AND the software!
700+ Videos in Our Video Library (Click Any to Preview)
Join to Unlock Full Video Library
November 2024
xTool Creative Space: Design Laser Cut Wood Inlay Using Kerf
Master kerf when you're laser cutting by following these pro tips! This is...

February 2026
How to Convert a PNG to a Laser File in xTool Studio (Formerly xTool Creative Space)
Learn how to convert flat PNG files into layered laser-ready designs in xTool...

June 2024
Intermediate Video: How to Set Up xTool Rotary With Chuck
Get the xTool RA2 Pro Rotary set up with the chuck so you...
Tara M
Time is Money
As a business owner, I know that time is money, and having access to someone as knowledgeable as Melissa has been worth every dollar I've invested. Her guidance has saved me countless hours of trial and error.
Sherry B.
Don't Wait to Join
I should have joined when I first purchased my Silhouette. Would have saved myself a lot of money on wasted vinyl and time... I am working on creating sticker designs for my small business.
Tiffany P
Expanded My Business
I completed a basic vinyl cut and print, HTV print, and more in less than a week of having my machine and it was all made possible by Silhouette U. I was met with a world of opportunities to expand my business, making it a one-stop shop by being able to offer my clients customized items for their events.
"Absolutely Worth It"
"I am brand new to the printing/cutting game, with a Roland BN2-20A. I joined Silhouette U because of all of Melissa’s helpful YouTube videos on my new machine. The membership has been absolutely worth it! Melissa is so knowledgeable and super responsive to any questions." - K.M. Silhouette U Member
